Imagine this: your trusty robot vacuum, once a silent warrior against dust bunnies and pet hair, is now wheezing its way across the floor, leaving trails of debris behind. It seems less like a high-tech cleaning marvel and more like it’s just pushing dirt around. What gives? Before you start shopping for a new one, the answer might be simpler and much cheaper. Let’s talk about the unsung hero of your machine’s performance and the simple steps on How To Replace Robot Vacuum Filter. This small component is the key to maintaining powerful suction and clean air in your home, and thankfully, changing it is easier than you think.
Why Bother Replacing Your Robot Vacuum Filter?
Let’s be honest, it’s a small, hidden part. It’s easy to forget it even exists. But ignoring your robot vacuum’s filter is like trying to run a marathon while breathing through a straw. Over time, that filter gets clogged with microscopic dust, pollen, pet dander, and all the other gunk it pulls off your floors.
When a filter is clogged, a few bad things happen:
- Reduced Suction Power: The motor has to work much harder to pull air through the clogged mesh. This means a dramatic drop in cleaning performance. You’ll notice your robot struggling with things it used to pick up effortlessly.
- Motor Strain and Overheating: Forcing air through a blockage puts immense strain on the vacuum’s motor. This can lead to overheating and, in the long run, can seriously shorten the lifespan of your expensive device.
- Poor Air Quality: A key job of the filter, especially a HEPA filter, is to trap allergens and fine particles, preventing them from being blown back into your room’s air. A full filter can’t do its job, meaning your robot could actually be recirculating the very pollutants you want it to remove.
Think of it this way: a clean filter allows your robot to breathe freely. This directly translates to maximum suction power, a longer-lasting motor, and cleaner air for you and your family.
How Often Should You Replace Your Filter?
This is one of the most common questions we get, and the answer is: it depends. The manufacturer’s recommendation is a great starting point, but your real-world usage is the most important factor.
As a general rule of thumb, most manufacturers suggest a replacement every 1 to 3 months.
However, you should consider replacing it more frequently if:
- You have pets: Pet hair and dander are filter-clogging champions. A household with a furry friend will need more frequent filter changes. In my house, with a golden retriever who sheds enough to knit a new dog every week, I check the filter every two weeks and replace it monthly.
- Someone in your home has allergies or asthma: For these individuals, maintaining pristine air quality is non-negotiable. A fresh HEPA filter is your best line of defense against airborne irritants.
- Your home has a lot of carpet: Carpets hold onto much more fine dust and debris than hard floors, giving your filter a tougher workout.
- You live in a dusty environment: Construction nearby? Live on a busy street? These external factors mean more fine particles are making their way inside.
Expert Tip: Don’t just rely on a schedule. Visually inspect your filter every couple of weeks when you empty the dustbin. If it looks visibly dirty, discolored, or you notice a drop in performance, it’s time for a change, regardless of how long it’s been.
The Step-by-Step Guide: How to Replace Robot Vacuum Filter
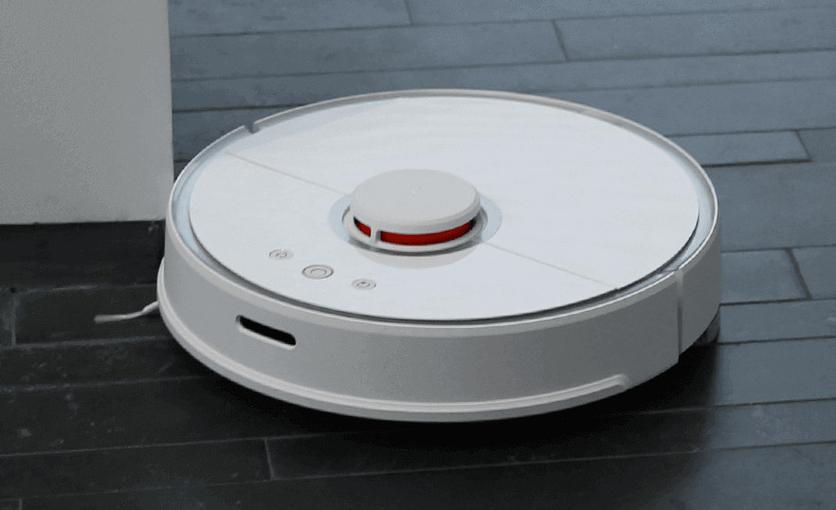
Ready to give your robot a new lease on life? The process is incredibly straightforward and usually takes less than two minutes. While the exact location of the filter can vary slightly between brands like Roomba, Roborock, or Eufy, the core principles are the same.
- Power Down and Flip: First things first, turn your robot vacuum off completely to be safe. Place it upside down on a soft surface, like a towel or rug, to avoid scratching its sensors or top plate.
- Remove the Dustbin: Locate and remove the dustbin. On most models, there’s a release button or latch. The dustbin usually slides or pops out from the side or back of the robot.
- Open the Dustbin and Locate the Filter: Once the dustbin is out, open its main compartment door (the same one you use to empty it). Inside, you’ll see the filter, typically a pleated, rectangular cartridge seated in its own housing.
- Remove the Old Filter: Most filters can be pulled out easily using a small tab. Some might be held in by a little plastic latch you need to unclip. Take note of how it’s oriented before you pull it out. Give the dustbin a good tap over a trash can to knock out any loose dust from the filter housing.
- Clean the Dustbin (Optional but Recommended): While you have it out, this is the perfect time to give the dustbin a thorough cleaning. Many are washable (check your manual!). Wash it with lukewarm water and mild soap, but make sure it is 100% completely dry before you re-install it. Putting a wet dustbin back in your robot is a recipe for disaster.
- Install the New Filter: Take your new filter and slide it into the same slot the old one came from. It should click or fit snugly into place. There’s usually only one way it can go in, so you can’t really get it wrong.
- Reassemble and Test: Close the dustbin door, slide the dustbin back into your robot vacuum until it clicks, and you’re done! Flip it back over, power it on, and let it run. You should immediately notice a difference in the sound and its suction power.
Learning how to replace robot vacuum filter is a fundamental part of ownership that pays huge dividends in performance.
Can I Just Clean the Filter Instead?
That’s a great question. The answer depends on the type of filter your model uses.
- Non-Washable Filters: The vast majority of standard filters are made of a paper-like material and are not washable. Getting them wet will ruin the delicate fibers and destroy their filtering ability. For these, you can extend their life slightly by gently tapping them against the side of a trash can to dislodge surface-level dust.
- Washable Filters: Some newer models come with washable filters. These can be rinsed under cool water until the water runs clear. However, it is critically important that you let them air dry completely for at least 24 hours before reinstalling them. A damp filter can lead to mold, mildew, and can damage the robot’s motor. Even washable filters degrade over time and will eventually need to be replaced.
Choosing the Right Replacement Filter
When it’s time to buy new filters, you’ll generally face two choices: OEM (Original Equipment Manufacturer) filters from the brand that made your robot, or third-party filters from other companies.
- OEM Filters: These are guaranteed to fit perfectly and meet the manufacturer’s performance specifications. They are the safest, most reliable choice, especially if your robot is still under warranty.
- Third-Party Filters: These are often much cheaper and sold in multi-packs. The quality can be a mixed bag. Some are excellent and indistinguishable from the original, while others may have a poor fit or lower-quality filter material that can impact performance and air filtration.
Our advice? If you can, stick with OEM. If you opt for third-party, read reviews carefully from other users with the same robot model as you. Never compromise on a good fit; a filter that doesn’t seal properly is letting dusty air bypass it completely.
|
Our Picks for the Best Robot Vacuum in 2025
As an Amazon Associate, we earn from qualifying purchases.
|
||
| Num | Product | Action |
|---|---|---|
| 1 | MONSGA Robot Vacuum and Mop Combo, 5000Pa Robotic Vacuum with 3.5L Self Emptying Station, Lidar Navigation Robot Vacuum Cleaner, 180mins Runtime, APP/Remote/Voice Control, for Hard Floors and Carpets |

|
| 2 | Shark AV2501S AI Ultra Robot Vacuum, with Matrix Clean, Home Mapping, 30-Day Capacity HEPA Bagless Self Empty Base, Perfect for Pet Hair, Wifi, Dark Grey |
|
| 3 | ILIFE V2 Robot Vacuum Cleaner, Tangle-Free Suction, 120 Mins Runtime, Slim, Self-Charging Robotic Vacuum Cleaner, Ideal for Pet Hair and Hard Floors |
|
| 4 | Shark Matrix Plus 2in1 Robot Vacuum & Mop with Sonic Mopping, Matrix Clean, Home Mapping, HEPA Bagless Self Empty Base, CleanEdge, for Pet Hair, WiFi, Compatible with Alexa, Black/Gold (AV2613WA) |
|
| 5 | Tikom Robot Vacuum and Mop Combo, 5000Pa Robotic Vacuum Cleaner, 150 Min Max, App & Remote Control, Ideal for Hard Floor, Carpet, Pet Hair, Self-Charge(G8000 Max) |
|
| 6 | Shark AV2501S AI Ultra Robot Vacuum, with Matrix Clean, Home Mapping, 30-Day Capacity HEPA Bagless Self Empty Base, Perfect for Pet Hair, Wifi, Dark Grey |
|
| 7 | Shark AV753 ION Robot Vacuum, Tri-Brush System, Wifi Connected, 120 Min Runtime, Works with Alexa, Multi Surface Cleaning, Grey |
|
| 8 | ILIFE V2 Robot Vacuum Cleaner, Tangle-Free Suction, 120 Mins Runtime, Slim, Self-Charging Robotic Vacuum Cleaner, Ideal for Pet Hair and Hard Floors |
|
| 9 | ILIFE A30 Pro Robot Vacuum and Mop, Self Emptying Station for 60 Days, 5000Pa Suction, LiDAR Navigation, No-Go Zones, 2.4G WiFi/App/Alexa/Remote Control, Roller Brush for Carpet, Hard Floors, 110V |
|
| 10 | Shark Robot Vacuum & Mop Combo, Powerful Suction, Matrix Plus, 60-Day Debris Capacity, HEPA Bagless Self Empty Base, Sonic Mopping, Home Mapping for Pet Hair - Carpets & Hardfloor, AV2610WA |
|
Pro Tips for Maximum Filter Life and Performance
As someone who lives and breathes this technology, I’ve picked up a few tricks over the years to get the most out of every filter.
“People focus so much on the robot’s LiDAR and smart navigation,” says Dr. Evelyn Reed, a specialist in robotic engineering, “but they forget that at its core, it’s a vacuum. The single most impactful thing a user can do for day-to-day performance is maintain the physical cleaning components, and the filter is number one on that list.”
- Use a Soft Brush: Get a small, soft-bristled brush (like an old toothbrush) and gently brush the pleats of your filter every time you empty the bin. This removes caked-on dust without damaging the filter material.
- Have a Rotation System: If you have a washable filter, buy a spare. This way, you can pop in the clean, dry one immediately while the other one takes its time air-drying for 24-48 hours. No downtime for your robot!
- Reset Maintenance Reminders: Many robot vacuum apps have a feature that tracks the life of accessories like filters and brushes. After you learn how to replace robot vacuum filter and install a new one, don’t forget to reset this counter in the app.
Beyond the Filter: A Quick Maintenance Checklist
While the filter is critical, it’s part of a team. To keep your robot in peak condition, give it a quick check-up every month.
- [ ] Main Brush: Remove it and clear away any tangled hair or string. A small cutting tool often comes with the robot for this purpose.
- [ ] Side/Edge Brushes: Unscrew them and clean any debris caught underneath. Check for bent bristles.
- [ ] Sensors: Wipe the cliff sensors (on the bottom) and navigation sensors (often on the front or top) with a clean, dry microfiber cloth.
- Wheels: Check that the wheels spin freely and clear any tangled hair from the axles.
Frequently Asked Questions (FAQ)
What happens if I never change my robot vacuum filter?
If you never change the filter, your robot’s suction power will severely decrease, it will clean poorly, and the motor will be under constant strain, likely leading to premature failure. It can also circulate dust and allergens back into your home’s air.
Can a clogged filter cause my robot vacuum to show an error message?
Yes, absolutely. Many smart robot vacuums have sensors that can detect airflow blockages. A clogged filter is a common cause for errors related to the fan or suction system. Learning how to replace robot vacuum filter is often the first step in troubleshooting these errors.
Is a HEPA filter really better for a robot vacuum?
Yes, especially for households with pets or allergy sufferers. A true HEPA filter captures 99.97% of particles as small as 0.3 microns, including pet dander, dust mites, and pollen, which standard filters might miss.
How do I know what kind of filter my robot vacuum needs?
The best way is to check your user manual or look up your specific model number on the manufacturer’s website. The filter type is a crucial detail, so make sure you purchase the correct one for a proper fit and function.
Can I use a compressed air can to clean my robot vacuum filter?
It’s generally not recommended. The force of compressed air can be too strong and can easily tear or damage the delicate paper or fabric mesh of the filter, making it ineffective. Tapping it gently is a much safer method.
Your Partner in a Cleaner Home
Your robot vacuum is a sophisticated piece of technology, but its long-term health and performance rely on simple, consistent maintenance. It’s not just about flashy features like self-emptying docks or advanced mapping; it’s about the fundamentals.
By taking two minutes every month to inspect and, when needed, change the filter, you are ensuring your investment continues to work for you. You’ll enjoy more powerful cleaning, better air quality, and a longer life for your automated cleaning companion. Now that you know exactly how to replace robot vacuum filter, you have the power to keep your home effortlessly clean for years to come.