Is your trusty robot vacuum starting to act a little… clumsy? Maybe it’s bumping into furniture it used to avoid, getting nervously stuck at the edge of a dark rug, or spinning in circles like it’s lost its way. It’s a frustrating scene, especially when you’ve come to rely on that automated cleaning magic. Before you start thinking about a costly replacement, the solution might be simpler than you think. Learning How To Calibrate Robot Vacuum Sensors is often the key to restoring your bot’s brilliant navigation and getting it back to its peak performance. It’s like a quick trip to the eye doctor for your little cleaning companion.
Why Your Robot’s Senses Get Out of Whack
Think of your robot vacuum’s sensors as its eyes, ears, and sense of touch. They are the high-tech components that allow it to “see” walls, “feel” obstacles, and “detect” dangerous drops like stairs. Over time, a few things can throw these delicate senses off balance:
- Dust and Grime Buildup: This is the number one culprit. A fine layer of dust on a cliff sensor can make your robot think it’s perpetually at the edge of a cliff.
- Environmental Changes: Did you recently get a new dark-colored rug or rearrange the furniture? Significant changes can confuse a robot’s existing map and sensor readings.
- Software Glitches: Like any smart device, a random bug from a firmware update or a simple software hiccup can cause navigation issues.
- Minor Bumps: A few too many hard knocks against a table leg can sometimes physically misalign a sensor, particularly the bumper.
Calibrating these sensors essentially resets their baseline, telling the robot what “normal” looks like again. It helps the device re-learn its environment and interpret the data it’s receiving correctly.
The Key Sensors: A Quick Meet and Greet
Before we dive into the “how-to,” let’s quickly get to know the sensory team working inside your robot. Understanding what they do makes troubleshooting much easier.
Cliff Sensors (The Daredevils)
Usually found on the underside of the robot, these are a set of infrared (IR) sensors that constantly beam a signal downwards. If the signal doesn’t bounce back quickly, the robot knows it’s at the edge of a drop and immediately backs away. This is why some very dark or black carpets can sometimes trigger them, as the dark color absorbs the IR light, fooling the sensor into thinking it’s a void.
Bumper Sensors (The Feelers)
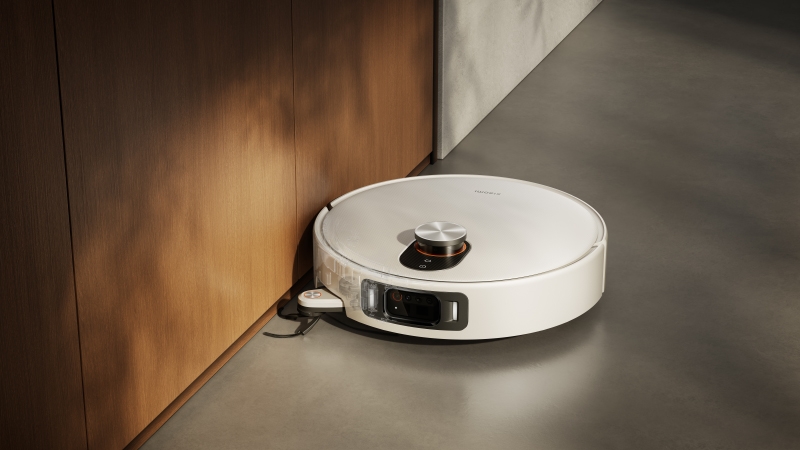
This is the large, physical bumper on the front of your robot. When it makes contact with an object like a wall or a chair leg, it presses inward, triggering an internal sensor that tells the robot’s brain to stop and find a new path. It’s a crucial part of its close-quarters navigation.
Wall and Object Sensors (The Guides)
Often using infrared technology, these sensors help the robot follow along walls at a consistent distance for perfect edge cleaning. They also help it slow down as it approaches an object before the physical bumper makes contact, allowing for a gentler touch.
Navigation Sensors (The Brains of the Operation)
This is where the magic happens, and it’s typically one of two types:
- LiDAR (Light Detection and Ranging): A spinning laser turret on top of the robot that creates a highly accurate, 360-degree map of the room. It’s the gold standard for methodical, efficient navigation.
- vSLAM (Visual Simultaneous Localization and Mapping): These robots use a camera, often pointed upwards at the ceiling, to identify landmarks and build a map. It’s a different, but also very effective, method of smart navigation.
Your Step-by-Step Guide on How to Calibrate Robot Vacuum Sensors
Ready to give your robot a sensory tune-up? While the exact process can vary slightly by brand (like iRobot Roomba, Roborock, or Eufy), this general guide covers the universal steps that work for most models.
Step 1: The All-Important Cleaning
You can’t calibrate what you can’t see! This is the most critical first step.
- Power Down: Turn the robot vacuum completely off. For some models, you may need to remove it from the charging dock and hold the power button down.
- Get Access: Flip the robot over onto a soft surface, like a towel or rug, to avoid scratching it.
- Wipe the Cliff Sensors: Locate the 4-6 small, clear “windows” on the underside, usually around the perimeter. Use a clean, dry microfiber cloth to gently wipe away all dust and debris. For stubborn grime, you can slightly dampen the cloth with water. Never spray cleaner directly onto the sensors.
- Clean the Wall/Object Sensors: Look for the dark, plastic sensor windows on the side and front of the robot. Wipe these down with your microfiber cloth as well.
- Clean the Bumper: Gently press one side of the bumper and then the other. Use a can of compressed air to blow out any dust or debris that might be caught in the gap, preventing it from moving freely.
Pro Tip: Make sensor cleaning a part of your weekly maintenance routine. Just a quick wipe-down when you empty the dustbin can prevent 90% of sensor-related navigation problems before they even start.
Step 2: The Soft Reset (The Quick Fix)
Sometimes, all it needs is a simple reboot to clear a software glitch, much like restarting your computer.
- Place the robot vacuum on its charging dock and ensure it’s charging.
- Find your model’s specific reset sequence. For many Roombas, this involves holding down the “CLEAN” button for about 10-20 seconds until the light ring swirls. For other brands, you might have to press and hold two buttons simultaneously.
- Consult your user manual or the manufacturer’s website for the exact button combination. This will restart the robot’s software without deleting your maps or schedules.
Step 3: The In-App Calibration (If Available)
Many modern, app-connected robot vacuums have a built-in sensor calibration or diagnostic tool within their mobile application.
- Open your robot’s companion app (e.g., iRobot HOME, Roborock, EufyHome).
- Navigate to the settings or maintenance section for your specific robot.
- Look for an option labeled “Sensor Check,” “Device Diagnostics,” or “Calibrate Sensors.”
- Follow the on-screen instructions. The app will guide you through the process, which may involve placing the robot in a specific location or running a short diagnostic routine.
Step 4: The Factory Reset (The Last Resort)
If the previous steps haven’t worked, a factory reset is the final DIY option. Warning: This will erase all your data, including saved maps, schedules, and Wi-Fi settings, returning the robot to its out-of-the-box state.
- Locate the factory reset button or button combination for your model. It’s often a small, recessed button that requires a paperclip to press, or a specific sequence of holding down multiple buttons.
- Perform the reset according to the manufacturer’s instructions.
- You will need to set up the robot from scratch, including connecting it to your Wi-Fi and letting it create a new map of your home. This fresh start can often resolve deep-seated software issues affecting sensor performance.
As robotics engineer Dr. Evelyn Reed states, “Think of a factory reset as giving the robot’s brain a completely clean slate. By forcing it to re-map and re-learn its environment from zero, you eliminate any corrupted data that might have been causing the erratic sensor behavior.”
When Calibration Isn’t the Answer
You’ve cleaned the sensors and tried a reset, but your robot is still acting up. What now? It’s possible you’re dealing with a hardware issue.
- A Failed Sensor: The sensors themselves can fail. If a single cliff sensor is broken, the robot may constantly think it’s about to fall, causing it to spin in circles or refuse to move.
- Internal Damage: A hard fall down the stairs or a significant impact could have damaged the internal wiring or the sensor module itself.
In these cases, your best bet is to contact the manufacturer’s customer support. They can run remote diagnostics or guide you on how to send the unit in for repair if it’s still under warranty. Knowing how to calibrate robot vacuum sensors is a powerful skill, but it’s also important to know when to call in the professionals.
|
Our Picks for the Best Robot Vacuum in 2026
As an Amazon Associate, we earn from qualifying purchases.
|
||
| Num | Product | Action |
|---|---|---|
| 1 | Shark Robot Vacuum & Mop Combo, Powerful Suction, Matrix Plus, 60-Day Debris Capacity, HEPA Bagless Self Empty Base, Sonic Mopping, Home Mapping for Pet Hair - Carpets & Hardfloor, AV2610WA |

|
| 2 | ILIFE A30 Pro Robot Vacuum and Mop, Self Emptying Station for 60 Days, 5000Pa Suction, LiDAR Navigation, No-Go Zones, 2.4G WiFi/App/Alexa/Remote Control, Roller Brush for Carpet, Hard Floors, 110V |
|
| 3 | ILIFE V2 Robot Vacuum Cleaner, Tangle-Free Suction, 120 Mins Runtime, Slim, Self-Charging Robotic Vacuum Cleaner, Ideal for Pet Hair and Hard Floors |
|
| 4 | MONSGA Robot Vacuum and Mop Combo, 5000Pa Robotic Vacuum with 3.5L Self Emptying Station, Lidar Navigation Robot Vacuum Cleaner, 180mins Runtime, APP/Remote/Voice Control, for Hard Floors and Carpets |
|
| 5 | Shark AV753 ION Robot Vacuum, Tri-Brush System, Wifi Connected, 120 Min Runtime, Works with Alexa, Multi Surface Cleaning, Grey |
|
| 6 | ILIFE V2 Robot Vacuum Cleaner, Tangle-Free Suction, 120 Mins Runtime, Slim, Self-Charging Robotic Vacuum Cleaner, Ideal for Pet Hair and Hard Floors |
|
| 7 | Tikom Robot Vacuum and Mop Combo, 5000Pa Robotic Vacuum Cleaner, 150 Min Max, App & Remote Control, Ideal for Hard Floor, Carpet, Pet Hair, Self-Charge(G8000 Max) |
|
| 8 | Shark AV2501S AI Ultra Robot Vacuum, with Matrix Clean, Home Mapping, 30-Day Capacity HEPA Bagless Self Empty Base, Perfect for Pet Hair, Wifi, Dark Grey |
|
| 9 | Shark Matrix Plus 2in1 Robot Vacuum & Mop with Sonic Mopping, Matrix Clean, Home Mapping, HEPA Bagless Self Empty Base, CleanEdge, for Pet Hair, WiFi, Compatible with Alexa, Black/Gold (AV2613WA) |
|
| 10 | Shark AV2501S AI Ultra Robot Vacuum, with Matrix Clean, Home Mapping, 30-Day Capacity HEPA Bagless Self Empty Base, Perfect for Pet Hair, Wifi, Dark Grey |
|
Frequently Asked Questions (FAQ)
Q: How often should I clean my robot vacuum’s sensors?
A: For optimal performance, a quick wipe-down of the cliff and object sensors with a dry microfiber cloth once a week is a great habit. If you have pets or a particularly dusty home, you might want to do it twice a week.
Q: Can a dark rug really stop my robot vacuum?
A: Yes, it’s a common issue. Very dark black or patterned rugs can absorb the infrared light from the cliff sensors, tricking the robot into thinking it’s a drop-off. Some newer models have improved sensors to handle this, but it can still be a problem for many.
Q: Does my robot vacuum need to be re-calibrated after I move furniture?
A: Not usually. A full calibration isn’t necessary. A robot with smart mapping (LiDAR or vSLAM) will simply update its existing map on the next cleaning run to reflect the new layout. A soft reset can sometimes help it re-orient itself more quickly.
Q: My robot vacuum won’t dock properly. Is this a sensor issue?
A: It very well could be! The robot uses an IR sensor to locate the homing beacon on its charging dock. Make sure the sensor on the robot and the dark plastic window on the dock are both clean and free of dust.
Q: Will a factory reset fix a broken sensor?
A: No. A factory reset can only fix software-related problems. If the sensor itself is physically broken or has failed electronically, a reset will not solve the issue. The hardware will need to be repaired or replaced.
A Smarter Clean Starts with Smart Sensors
Keeping your robot vacuum navigating like a pro is all about maintaining its senses. By regularly cleaning the sensors and knowing how to calibrate robot vacuum sensors through a simple reset or in-app tool, you can solve most common navigation hiccups yourself. This simple maintenance ensures your little helper continues to clean efficiently, intelligently, and reliably, giving you back those spotless floors you love without any of the frustration.